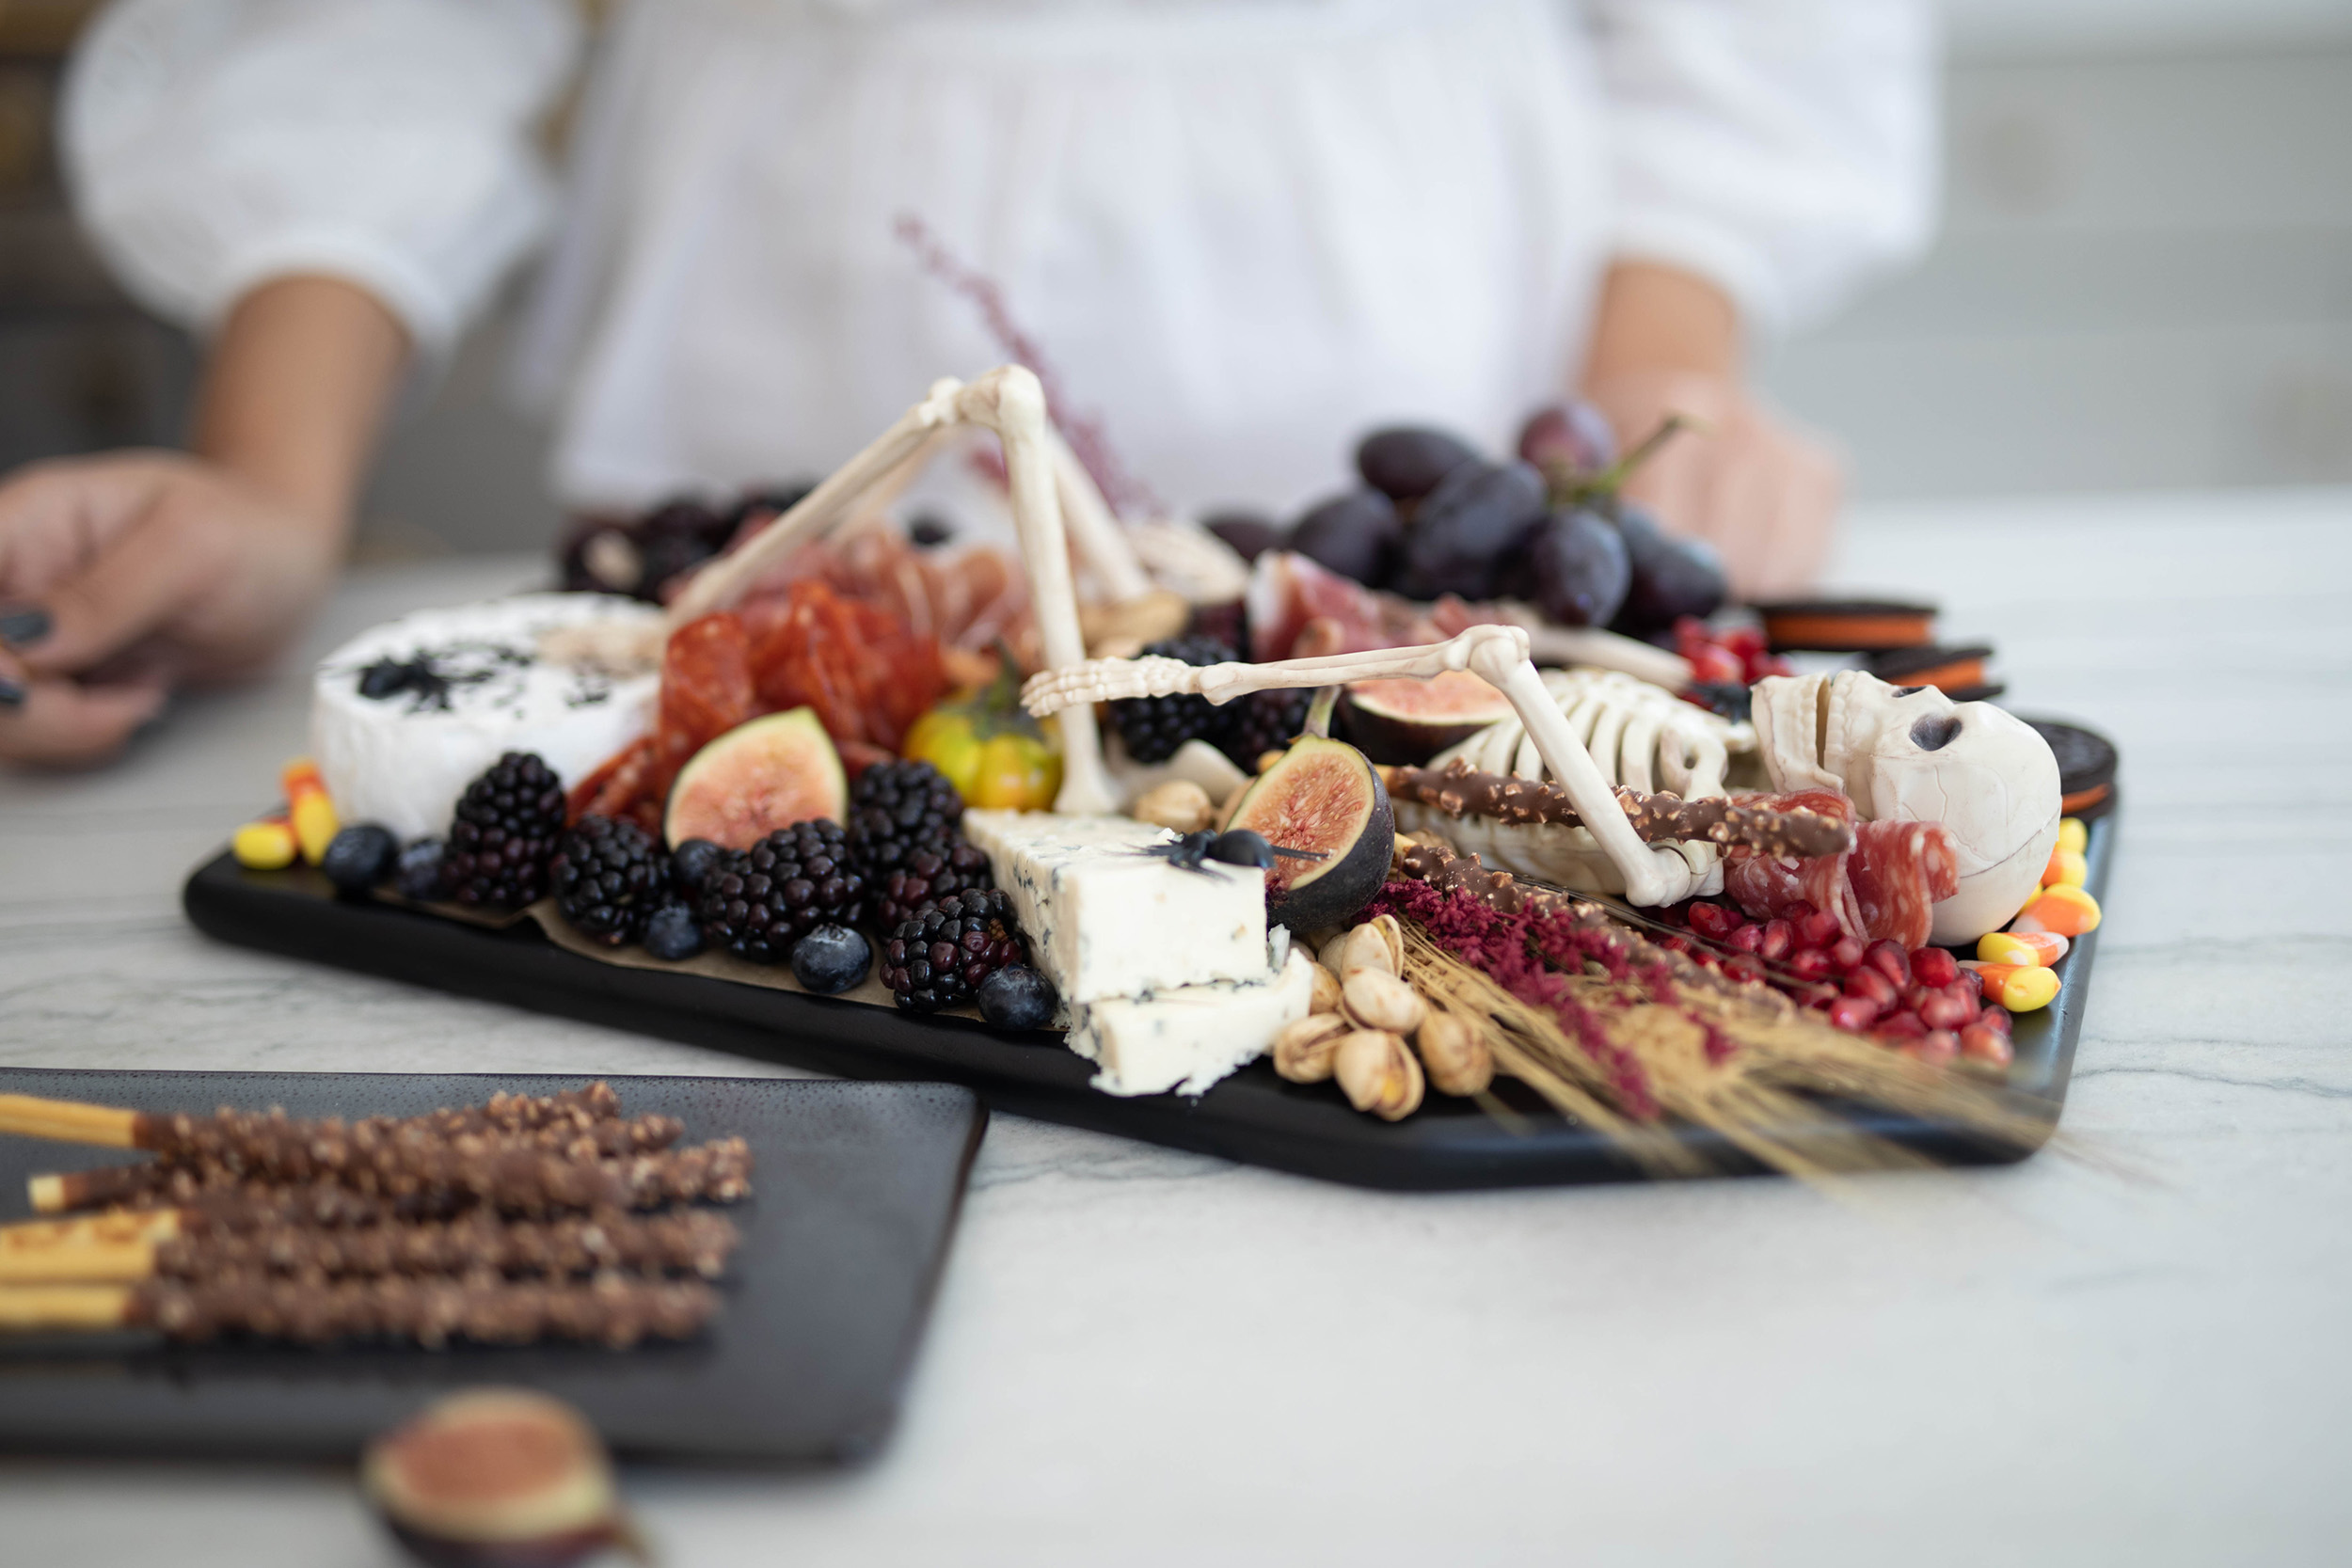
At Chèr House we love a good charcuterie board! Halloween is right around the corner and we are so ready for all of the spooky festivities.
Charcuterie boards have something for everyone and are a perfect party hit. Building one can be intimidating but we are here to simplify the process and make it fun.
Follow along for a step-by-step guide on how to build your own Halloween charcuterie board.
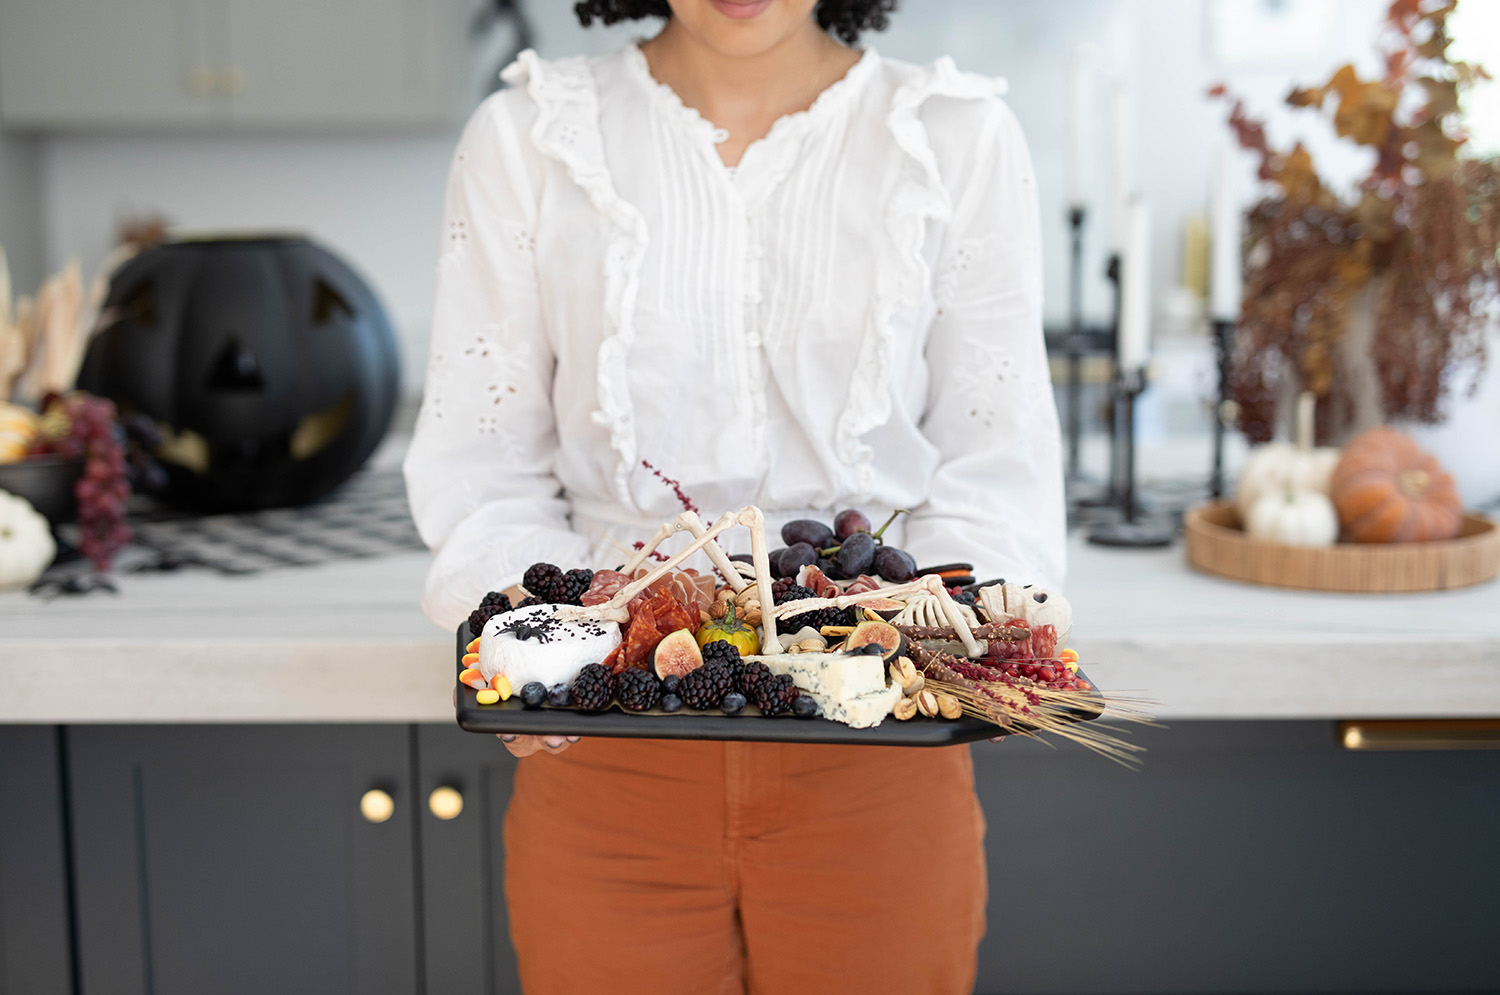
THE DETAILS
The 3 basic items you will need include a serving board, utensils, and a few small bowls or dishes.
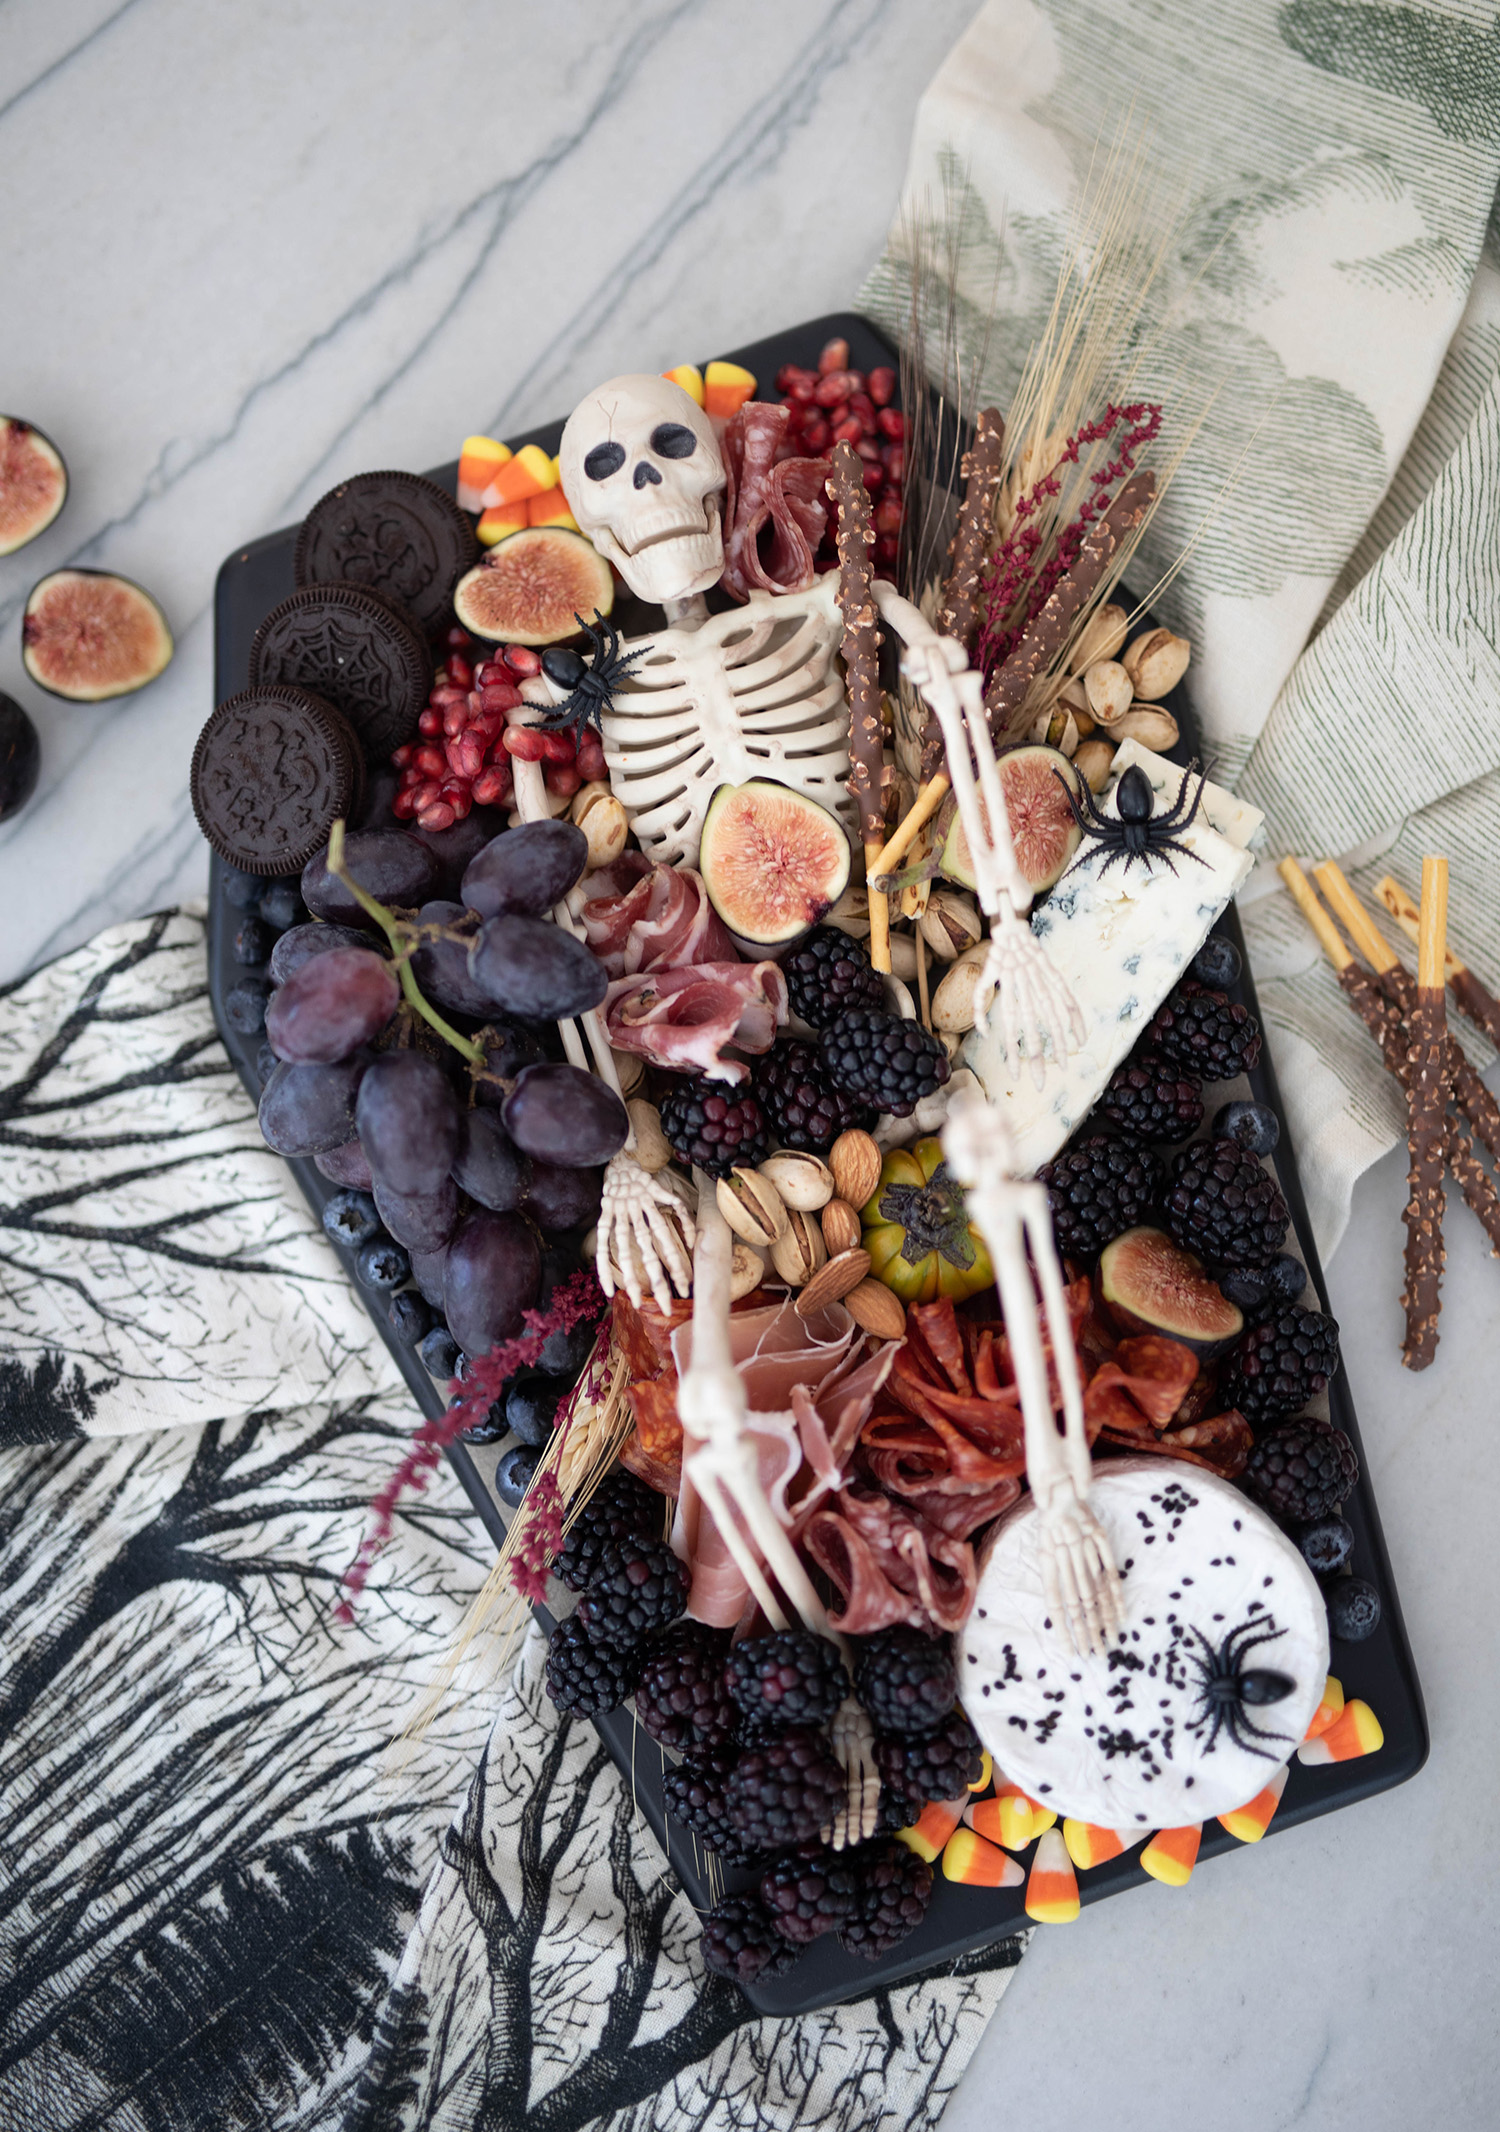
We started with the Wood Coffin Board from Target and added a Mini Skeleton from Party City.
Here is a quick breakdown of the areas we like to keep in mind before grocery shopping –
Meats: Usually one of the larger components on the board. We like to offer 3 different types of meat – our favorites are cured meats such as salami and prosciutto.
Cheese: Keep in mind a variety of cheeses with different flavorings and textures. Hard cheese like parmesan, semi-soft cheese like cheddar or gouda, and soft cheese such as brie or blue cheese.
Crispy Carbs: Different breads and crackers used for dipping and building that perfect bite.
Extras: These are the items we like to put in small bowls or to use as filler throughout the board. A mixture of sweet and salty elements is always our goal. Some of our favorites include; pickles, olives, dried fruits and nuts, jams, honey, and spreads.
Decor: Don’t forget the decor! We love adding a few fresh florals or dried branches on and around the board.


TRADER JOES SHOPPING LIST
We purchased all food items from Trader Joes. Below is our exact shopping list – every store is different so we always keep in mind some possible substitutions to use for unavailable items. When in doubt, get creative.
- Blackberries
- Blueberries
- Dark Grapes
- Purple Figs
- Salami/Meat
- Pistachios
- Whole Almonds
- Blue Cheese
- Pub Cheese
- Brie
- Crackers
- Pomegranate Seeds
- Chocolate Pretzel Sticks
- Candy Corn
- Cookies
- Fall Florals
*TIP – Don’t feel the need to buy the most expensive meats and cheeses. Beautiful boards can still be built on a budget.
BUILDING THE BOARD
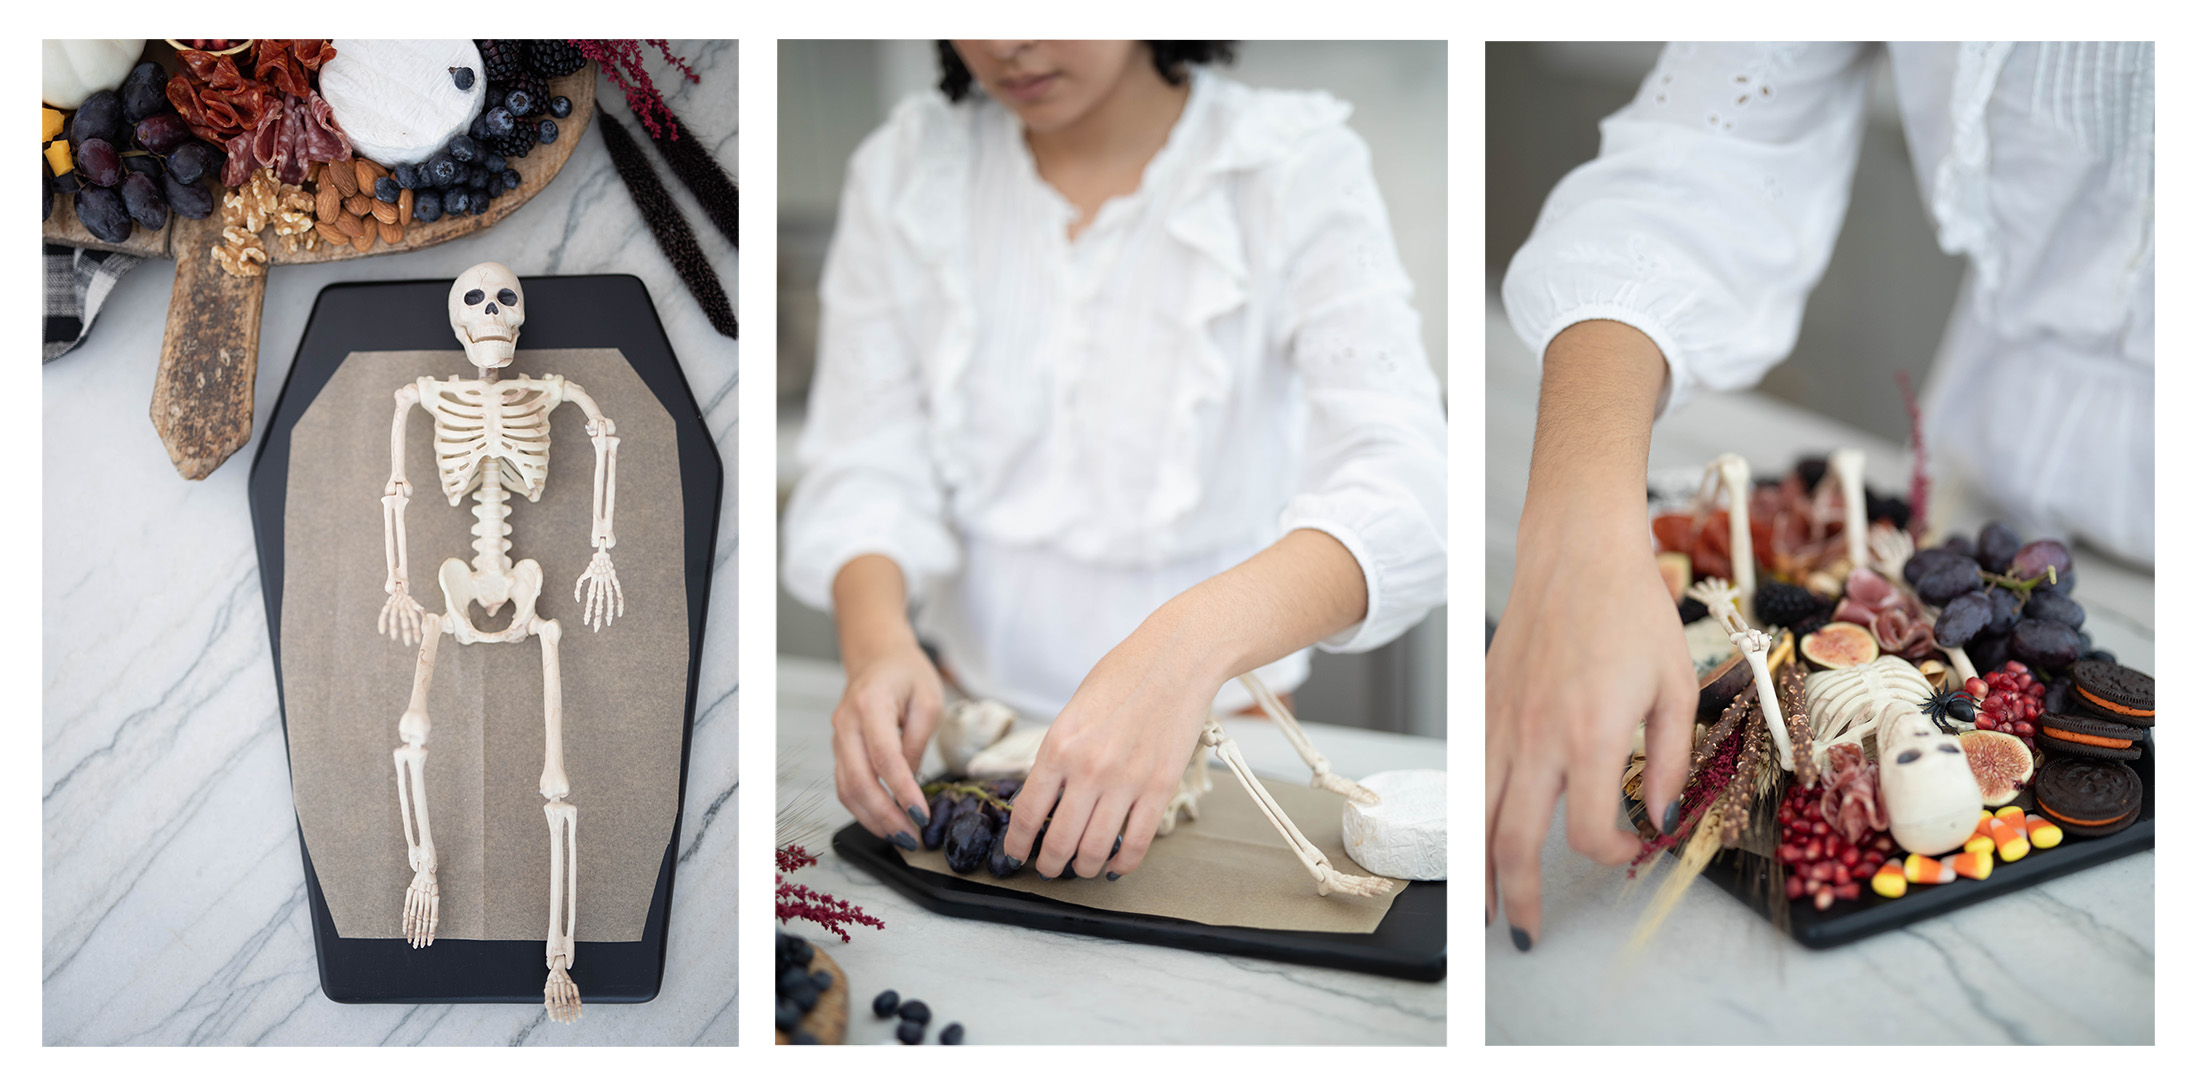
*Before building – lay a sheet of Reynolds Unbleached Compostable Parchment Paper down. This will protect your serving board from any grease or staining and make clean up easier. Unless you can refrigerate the entire board, we recommend arranging it 30 minutes prior to serving.
- Start with the largest items. If you are not using any bowls, this is usually the cheese. Arrange the different types of cheeses so they are evenly distributed.
- Add the grape bunch, meat, and blackberries next. For meats, get creative with placement. We like doing a tri-fold to create a delicate flower look.
- The remaining items are now filler – use nuts, candy, and seeds to hide any gaps on the board.
- Lastly, cut a few dried florals or branches for a finishing touch. Less is more on this step – we still want the focus to be on the edible items.

HAPPY HALLOWEEN!
xx Chèr House

